Tuesday, January 7, 2014
Tuesday, December 31, 2013
Tuesday, December 24, 2013
Friday, December 28, 2012
Vadakari
I had been looking for Vadakari recipe when I came across this recipe in AskChitvish iPad app. I bookmarked it and was looking for an opportunity to make it. One Sunday evening the snack turned out to be masala vadas. I saved few of those vadas to make Vadakari. The original recipe asked for mint leaves and gave specific instructions on making tomato puree. But me being lazy, decided to skip few steps. Of course it turned out to be my take on Vadakari but nevertheless it turned out to be super delicious. The proof being there were no leftovers.

Ingredients
For making vadas
Chana dal/ Gram dal - 1 cup
Red chillies - 3
Garlic - 2 cloves (optional)
Saunf - 1 tsp
Salt - as per taste
Onion - 1 chopped finely
Coriander/Cilantro - 2 tbsp
Oil - for deep frying
For making gravy
Tomatoes - 2
Onion - 1 chopped finely
Garlic - 1 clove chopped finely/mashed/grated
Saunf - 1 tsp
Turmeric powder - 1/2 tsp
Salt - as per taste
Oil
Water - 2 cups
Coriander/Cilantro - 1 tbsp for garnish
Preparation
Soak chana dal in water for 2 hours. Coarsely grind soaked chana dal with red chillies, garlic, saunf and salt in a mixer. Add chopped onions and cilantro to the ground mixture. Shape into small balls and deep fry in hot oil. I remove them on seeing nice light brown color on the balls. Allow the balls to cool down completely. Crumble the balls/vadas.
Puree tomatoes in a mixer. (You can also use ready made tomato puree). Heat oil. Add saunf. Add onion and garlic. Saute for 2 minutes till you see a nice golden color on the onions. Add tomato puree. Add turmeric powder. Add water and salt. Allow it to boil. Once it is boiling vigorously, reduce to medium heat. Add crumbled vadas and allow the mixture to come to a boil. If the mixture is too thick add hot water. Garnish with cilantro.
Vadakari is ready and yummy!
Vadakari pairs well with idli, dosa and aapam.
Recipe Source: Ask Chitvish iPad app. www.askchitvish.com
Tuesday, October 9, 2012
Green Bell Pepper Chutney
Traditionally the accompaniments for idli/dosa are coconut chutney, coriander chutney and tomato chutney. After having them for quite some time, there becomes a need to eat something different that is also easy to make. So here we go with the recipe of one such chutney:
Ingredients
Green bell pepper - 1 (chopped)
Onion - 1 (medium size)
Tomato - 1 (small size)
Green chilly - 1-2 (adjust according to taste)
Red chilly - 1-2 (adjust according to taste)
Gram dhall - 1 tbsp
Tamarind paste - 1/2 tbsp
Salt - as per taste
Oil
Preparation
In a pan, heat oil. Add red chilly and gram dhall. Saute for 20-30 seconds taking care not to burn gram dhall. Add green chilly. Saute for 10 seconds. Add onion. Saute for a minute. Add green pepper. Cover the pan with lid. After 2 minutes, open and mix. Check if bell pepper has become soft. At this stage add tomato and saute for a minute. Remove mixture from heat. Allow to cool.
In a mixer/blender blend the cooled mixture along with tamarind paste and salt. Add minimal water. Blend finely. Transfer to a bowl. This chutney goes well with idli/dosas.
Green bell pepper chutney is ready and yummy!
Friday, May 11, 2012
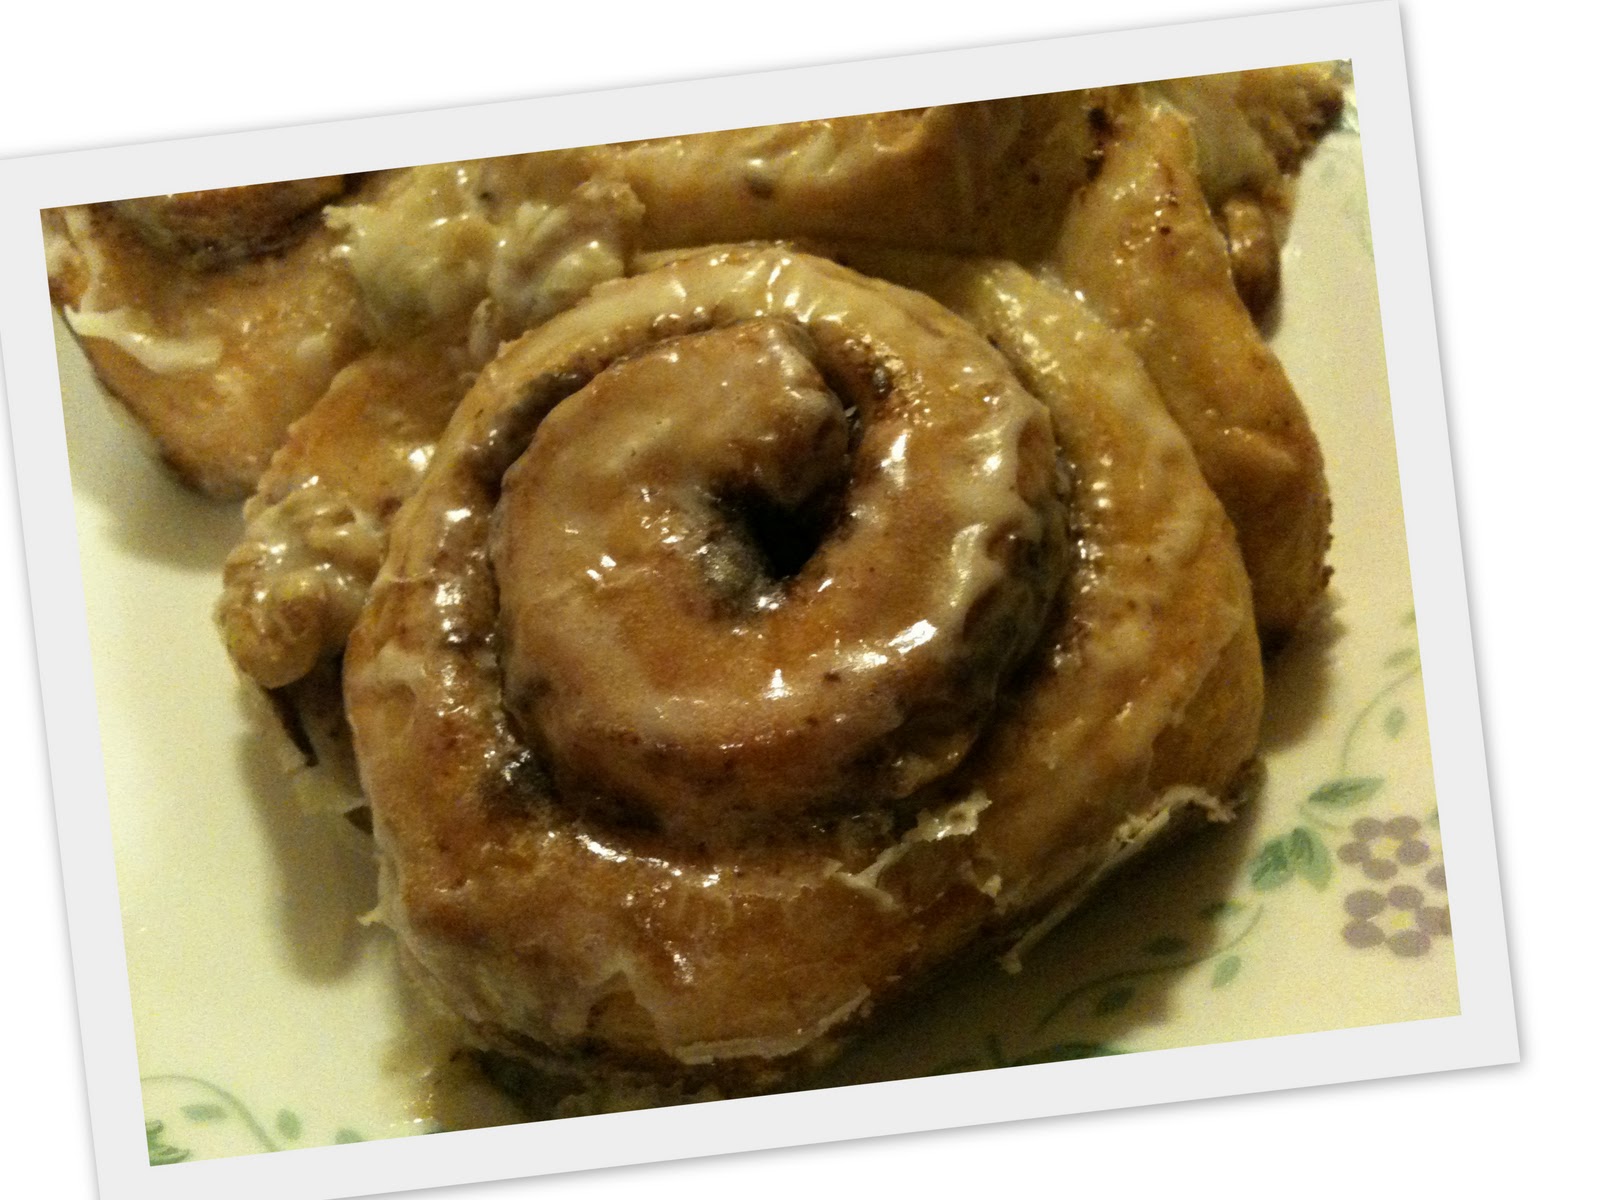
Cinnamon Rolls
There is nothing as comforting as sitting at home during rainy weather, watching the droplets fall one by one from the leaves with something interesting to eat. The cravings usually tend to be for something fried along with with something hot to drink. But the effort of making bajjis (vegetables dipped in lentil flour and fried) with little one at hand seemed to be a huge task. Also I was craving for something sweet. The thought of baking something seemed to make more sense. I had ready made cinnamon roll dough on hand. The warm smell that spread through the house was enough to bring cheer into the gloomy evening.
Ingredients
Pillsbury Cinnamon Rolls with Icing - 1 can
Walnuts - 1/3 cup
Preparation
Pre-heat oven to 375 degrees. Place cinnamon roll on baking dish. Chop walnuts. Add walnuts in between the spirals of the roll. Bake as specified in the package. Apply icing after removing from oven. This is best eaten when it is warm.
Cinnamon rolls are ready and yummy!
Ingredients
Pillsbury Cinnamon Rolls with Icing - 1 can
Walnuts - 1/3 cup
Preparation
Pre-heat oven to 375 degrees. Place cinnamon roll on baking dish. Chop walnuts. Add walnuts in between the spirals of the roll. Bake as specified in the package. Apply icing after removing from oven. This is best eaten when it is warm.
Cinnamon rolls are ready and yummy!
Saturday, April 21, 2012
Eggless Spicy Butterscotch Pudding
- Ingredients
- 2 tablespoons cornstarch
- 1/2 cup light brown sugar
- 1 pinch salt
- 1 cup milk
- 1 cup cream
- 2 teaspoons vanilla extract
- 1 tablespoon butter
- 1/4 teaspoon ground cinnamon
- 1 pinch chilli powder
Preparation
Whisk together the cornstarch, sugar and salt in a pan until smooth. Add the milk and cream. Mix well. Bring the ingredients to a simmer over low heat whisking constantly. Cook until the mixture begins to thicken. Remove the pan from heat. Stir in vanilla, butter, cinnamon and chilli powder. Pour the pudding into a bowl and chill for 1 hour before serving. Alternately you can pour in individual bowls and chill before serving.
Spicy Butterscotch Pudding is ready and yummy.
Recipe inspiration: Melissa D Arabian show in Food Network
Sunday, April 24, 2011
Semi Homemade Lemon Pound Cake
Taste is one of the traditional five senses. It refers to the ability to detect the flavor of substances. According to Wikipedia, the sensation of taste can be categorized into five basic tastes: sweetness, bitterness, sourness, saltiness and umami. Sourness is the taste that detects acidity. Generally between India and US, I find people in US more receptive to the sour taste. There are so many items exhibiting the sour taste profile. I had been using lemon as an added flavor to our Indian dishes while making lemon rice occasionally. But after seeing so many recipes in Food Network where lemon was used as a star ingredient, I was inspired.
The lemon is presumed to have originated from India, northern Burma and China. It was introduced to the Americas in 1943 when Christopher Columbus brought lemon seeds to Hispaniola along his voyages. Lemon juice, rind, and zest are used in a wide variety of culinary applications. In my recipe I have used lemon juice and zest.
Ingredients
Pound Cake or Yellow Cake Mix - 1 packet (I used Betty Crocker's Yellow Cake)
Ingredients as per the cake mix
Lemon - 4 (Depending upon the sourness level that you want, you can change this)
Sugar - 1 cup
Preparation
Prepare the cake batter as per the instructions given in the selected cake mixture. (If you are preparing the cake batter on your own, prepare the batter for plain sponge cake). Zest the four lemons. Extract the juice and keep it separately. Add the lemon zest to the batter. Mix thoroughly. Bake the cake as you normally would. Once the cake is ready, place it on a wire rack for cooling.
For Lemon Glaze
Melt sugar with 1/2 cup of water. (If you need nice white frosting replace plain sugar with confectioners sugar). Take it off the heat and add the lemon juice and mix thoroughly.
Pour the lemon glaze over the baked cake slowly allowing the cake to absorb the mixture. Lemon Pound Cake is ready and yummy!
Wednesday, March 9, 2011
Semi-Homemade Pizza
Did I forget the blog? Of course I did not forget the existence of this blog. Laziness..no. Writers block..yes. Chef's block? Luckily no.I have been trying couple of recipes and it sure has worked out on the positive side. Not updating the blog has sure been nagging me for quite sometime. Well now that I am here..moving on to the recipe: Homemade Pizza. Should I say semi home made pizza as I used store bought pizza base?
Ingredients
Pizza Base -1
Tomato Marinara Sauce - 1.5 cup (I used store bought tomato and mushroom pasta sauce)
Onion - 1 if big, 2 if small
Peas - 1 cup (I used frozen peas)
Cheese - 1 cup (I used Kraft Mexican Four Cheese)
Olive Oil
Preparation
Over the pizza base, spread the marinara sauce. Spread the cheese completely. Slice the onions thinly. Add the sliced onions and peas over the cheese. Pat it lightly so that it settles with the cheese. (By putting the onions over the cheese, I find that the onions caramelize better). Drizzle olive oil over the entire pizza. This helps caramelize the onions and gives a nice glow to the entire pizza. Bake the pizza in a 375'F oven for 23 minutes. Remove the pizza and allow it to cool for couple of minutes before biting into it. Pizza is ready and yummy!
Monday, December 27, 2010
Little Hearts (or maybe Big Hearts)
Coming from Chennai, India any cold is COLD for me. Moving to US, I have been forced to face the harsh winters (and huge utility bills thanks to the heaters). Snow is nice as long as it is fresh. After a day, it would become hard ice. So venturing out of the house is quite an adventure by itself. With two layers of clothes, thick jacket, cap, ear muff, scarf, snow boots and gloves you are sure to feel that you have now been trained to become an Eskimo. Maybe now you can tell your company that you are ready to be deployed in a project in Iceland.
But I should say winters sure increase the family time because you cannot venture out as easily as in summer time. Huddled close with your loved ones, Sound of Music movie, hot chocolate and warm cookies to munch on...what more could someone want. I made Palimers. But I know them as Little Hearts (from India). It was quite easy to make with the Ina Garten's recipe. Here is my version:
Ingredients
Puff Pastry Sheet - 1
Sugar - 1 cup
Salt - 1 tsp
Cooking Spray
Preparation
Preheat oven to 450' F. Combine the sugar and salt. Pour 1/2 cup of the sugar/salt mixture on a flat surface . Unfold the sheet of puff pastry (I defrosted it by placing the un-folded sheet in the microwave for a minute) onto the sugar and pour 1/2 cup of the sugar mixture on top, spreading it evenly on the puff pastry. With a rolling pin roll the dough until it is13 by 13-inches square and the sugar is pressed into the puff pastry on top and bottom. Fold the sides of the pastry towards the center so they go halfway to the middle. Roll from the sides towards the center so they go halfway to the middle. Cut the dough into 1/2 inch slices. Place the slices on the cut side up on the parchment paper over the baking sheets (I used cooking spray on top of the parchment paper). Sprinkle sugar on top of the slices.
Bake the cookies for 6-7 minutes until caramelized and brown on the bottom. Turn it to the other side and bake for another 4-5 minutes until caramelized. Transfer to rack and allow to cool.
Palmiers are ready and yummy!
Saturday, November 6, 2010
Broccoli Soup
Last month we visited New Hampshire to see the Fall Colors. Oh Boy! It was freezing cold and all we had were our fall jackets. Not much use but something was better than nothing. Yeah that is when I felt like having hot sambar vadai's and pepper rasam. (If you are wondering if I am drooling as I write this, then you guessed it right.) We headed to Subway (I am a big fan) to eat the buns and veggies only to find about 30 other Indians standing in the line before us. With the number of Indian's visiting that place I was surprised that there were no Indian restaurants. With the temperatures soaring down, weathers getting cooler there is nothing better than sipping on nice hot/warm soup.
The temperature as I write this post is 39 F i.e. 3.88 C. Thanks to Google I do not have to calculate using the 5/9 formula or maybe it is 9/5. Oh my God! How dependent I have become on Google that I do not know the basic formula itself. Coming back to the main part of this post. With only broccoli in hand, I decided to make it into a soup which I would say turned out to be good enough to be slurped down completely in 5 minutes. Here we go with the recipe:
Ingredients
Broccoli - 1.5 cup (chopped into florets)
Milk - 2 cups (I used 2%. If you want to make it low fat then milk - 1 cup and water - 1 cup)
Water - 1 cup
Flour - 1 tbsp
Onion - 1 (chopped finely)
Salt - as per taste
Cheese - 2 tbsp (I used reduced fat cheese)
Oil - 1 tbsp
Preparation
Heat oil. Add onion and fry till it is translucent. Add flour and mix thoroughly ensuring that it does not stick to the bottom of the vessel. Add milk and mix well. Allow it to simmer for 5 minutes. The mixture would have thickened by now. Add broccoli florets and water. Mix well. If you still find the mixture to be too thick you can add some more water. Add salt. Allow it to simmer till the broccoli is cooked well. Add cheese and mix well. Transfer to soup bowls. Broccoli soup is ready and yummy!
Note: Once the broccoli florets are cooked you can blend the entire mixture thoroughly to get a smooth creamy texture. If you are like me and like the pieces floating around skip the blending part.
~ Ramya
Wednesday, October 6, 2010
Rose Milk
This post has been long overdue. Time just flies by especially when you are in India for vacation. It looked like just yesterday when we were at the airport waiting to start the journey towards India. Now I am back again in the midst of a mechanical life. Of course I should not be clamoring so much ,since I moved out of India just six months back and I was lucky enough to go for a vacation within a short period of time. Six months is too less of a time to see any drastic differences. But yet I could see some differences (maybe because I moved out of Chennai couple of years back). Chennai is no longer the conservative metro that it used to be several years back. With the kind of malls, the world-class movie theatres, the global brands in the shopping arena, the fashion weeks, the audi's and the benz's, Chennai sure has changed. As I write this post, I realize that I had not visited T.Nagar side. If you are from Chennai, then you would realize that T.Nagar is an essence of Chennai. What a miss! It sure does make me feel nostalgic.
Coming to the recipe part of this post, Rose Milk is one thing that takes me back to sweet memories. My grandfather makes the rose milk concentrate at home. After drinking rose milk, using the home made concentrate, I started hating the commercial rose milk powders sold in the shops. During my visit, I was determined to learn the recipe. Oh Boy! It was super easy. Here we go with the recipe:
Ingredients
Sugar - 1 kg
Water - 1 - 1.5 cup
Rose Milk Essence - 2 tbsp (I used Tiger Brand's Rose Milk) - This is mainly for giving color to the drink.
Preparation
Over heat, add sugar and water in a wide mouthed vessel. Allow the sugar to melt completely, Keep stirring till the mixture thickens a little bit (No need to wait for the single thread consistency). Switch off the heat and allow the mixture to cool completely. Once the mixture is in room temperature, add the rose milk essence and mix thoroughly. Store in air tight bottles.
Whenever you want to drink rose milk, mix 1-2 tbsp (depending on the sweetness level that you need) with a glass of milk. Stir it well. Rose Milk is ready and yummy!
~ Ramya
Sunday, August 8, 2010
Puttu without Puttu Maker
Reality TV seems to have taken over completely. Of course it is a good break from the highly drama oriented never ending serials in our Indian channels. But I find some of the reality shows to be even more drama than our serials. After seeing them, it makes me wonder if Reality TV shows are Real? Especially Bravo TV's reality sucks. Yes I am talking about the Real Housewive's series, Bethenny Getting Married series etc. What I can see is only over dramatization of a fiction show taking place in reality by a bunch of hysterical rich people. Many people might even start thinking that their lives are very boring compared to what they are seeing on TV. Of course I am not saying that all reality TV is bad. There are some shows which I like, like the Next Food Network Start, Work of Art etc. I also like the Rachel Zoe project because it teaches reality in terms of the challenges faced by entrepreneurs.
Coming back to my real life, I have been trying out traditional dishes. One of the dishes that I tried was Puttu. The twist is not in the recipe but how I made puttu without using the puttu maker but still managing to get the shape. To make the puttu, I took pointers from Kailas Kitchen. Here we go with the recipe:
Ingredients
Puttu powder - 1 cup (I used the readymade)
Water - 1/4 cup
Coconut - 1/2 cup (I thawed the frozen one)
Thenkuzhal Mould
Aluminum Foil
Preparation
Mix water with the puttu powder till it resembles bread crumbs. (Tip from Jayasree: Ensure that it holds the shape when held in your fist.) I used Thenkuzhal Mould for making puttu. In the bottom part of the mould put the plate with 3 stars. Add 1 tbsp of coconut. Add 3 tbsp of puttu powder. Alternate between coconut and puttu powder till the mould is filled. Wrap the opening with aluminum foil. Steam cook it for 15-17 minutes. (After several trials I felt mine was done in 17 minutes). Allow it to cool for 3-4 minutes. Remove the aluminum foil. Remove the '3 star' part. Gently push using the top part of the mould. Delicious puttu is ready and yummy! I used channa masala as the side dish.
Notes
- The mould needs to be a light-weight one.
- I used Idli vessel for steaming.
- Update: Poke three holes in the aluminum foil. This will reduce the cooking time. I will post an update on the actual cooking time as soon as I try it out.
~ Ramya
Tuesday, July 6, 2010
Vegetarian Omlette
I cannot understand men's fashion of wearing their trousers below the waist. Of course, since it is the fashion world there is a terminology/jargon for it. It is known as "Sagging". Sagging is a manner of wearing trousers below the waist hanging below the waist area and therefore revealing much of the underwear.
According to Wikipedia, the origins of sagging come from the United States prison system due to two primary factors. First, uniforms issued to prisoners are usually a few sizes too large. Secondly, belts are sometimes prohibited to avoid suicide by hanging oneself, or to avoid being used as a weapon in fights.The style was later popularized by hip-hop artists in the 1990s. If you are wondering what I am talking about check this link: Sagging Photo
It is both disgusting and amusing at the same time. I trains / buses, that is the first thing that I notice. Of course I dont want to see their underwear :-) Initially I was worried as to when the pants would fall off, but now I am used to it. I am not the only one to think like this. A state senator from Brooklyn has started the 'Stop the Sag' campaign which says Raise Your Pants, Raise Your Image. Has it 'Stopped the Sag'? Not Yet...
Moving from my rant to the recipe. Recently I made some vegetarian omelettes. Though it is a breakfast dish, I made it for dinner. I picked the recipe from here. Here is my version:
Ingredients
Chickpea flour or Besan - 1 cup
Onion - 1 (chopped finely)
Tomato - 1 (chopped finely)
Green Chilli - 1 (chopped finely)
Coriander - 1 tbsp
Curry Leaves - 1 tbsp
Salt - as per taste
Oil - to make cheelas
Water - to mix
Preparation
Mix the flour, onion, tomatoes, green chillies, coriander, curry leaves, salt and water. The batter should be of dosa batter consistency. Make small dosas/pancakes in hot tava. Serve hot with green chutney!
Vegetarian Omelettes are ready and yummy!
Moving from my rant to the recipe. Recently I made some vegetarian omelettes. Though it is a breakfast dish, I made it for dinner. I picked the recipe from here. Here is my version:
Ingredients
Chickpea flour or Besan - 1 cup
Onion - 1 (chopped finely)
Tomato - 1 (chopped finely)
Green Chilli - 1 (chopped finely)
Coriander - 1 tbsp
Curry Leaves - 1 tbsp
Salt - as per taste
Oil - to make cheelas
Water - to mix
Preparation
Mix the flour, onion, tomatoes, green chillies, coriander, curry leaves, salt and water. The batter should be of dosa batter consistency. Make small dosas/pancakes in hot tava. Serve hot with green chutney!
Vegetarian Omelettes are ready and yummy!
Tuesday, June 22, 2010
Strawberry Preserve
You know those people who like to reveal the entire plot of the recently released movie and say that the movie sucks big time? I keep wondering why they do it. Is it because they think they are being generous to save us some money by spoiling our only major outing plan? Well they could not stop me! On Friday, the day slated for Raavanan's release, the only updates I could see on facebook were either the plot and opinions about the movie. Not to say none of the opinions were on the positive and it was continuing to be the same all through the weekend. But did it stop me from seeing the movie? No! :-)
I ended up going for the night show or should I call it the evening show. Not that it mattered. We were sitting in the theatre along with 10 other people with a secret joy of having the entire theatre to us. All of us became silent when the titles started. Then came couple of Hindi actors. We were all watching couple of dialogues, parts of a song and were eagerly waiting to find out how exactly all this fit into the Tamil movie.
And then it came, long sighs...when we realized, we were watching a trailer for an upcoming movie. The actual movie "Raavanan" then started. (Missed the whistles which is an integral part of watching a movie in India) Loved the movie. Found it visually stunning. I could see the movie again for all the visuals. Loved the climax location. "Beautiful" is how I can describe it. The underlying factor for the movie is "Love". Of course it is an integral part of Indian cinema. I would care less about the story (if any) and the acting. Finally there it was on Facebook. A positive review about the movie.
Coming back to my post, N had gone strawberry picking. He knew that I loved strawberries and my art of finishing a box of strawberries in one day. But what I did not expect was that, he would get 7 pounds of strawberries and expect me to finish it in a day since they were overly ripe. It was a day of strawberries for us. Strawberry dessert, strawberry milk shake and still there were 6 pounds of strawberries. Finally ended up making strawberry preserves taking the idea from Ina Garten, Barefoot Contessa. Here is the recipe:
Ingredients
Strawberries (cut into halves with the top portion removed) - 6 cups
Sugar - 1 cup (Change according to your taste)
Lemon Juice - 2 tbsp
Water - 1/4 cup
Salt - a pinch
Preparation
In a big pot, add sugar, water and lemon juice. Once the sugar has melted add the strawberries. Add salt. Lower the heat to low setting. Allow the entire mixture to simmer and thicken. Cook until the mixture gels on a cold plate (I kept the plate in the freezer) Once the mixture has reduced remove from heat. Allow it to cool and transfer to jars to use later.
I use these preserves for waffle topping, making milk shake, ice cream topping or just have a spoon of it whenever I feel like having something sweet :-)
Strawberry Preserves are ready and yummy!!!
~ Ramya
Saturday, June 5, 2010
Zucchini Cutlet
It has been a month since my last post. I have been traveling around US visiting Washington, Denver, Portland and Chicago. So the month of May has been full of packing, unpacking, cooking and packing food for N. I tried this zucchini cutlet the previous month and it has been lying in my drafts for a long time. I love this recipe since it is easy, fat free and stomach filling at the same time. Here we go with the recipe:
Ingredients
Zucchini - 1 (grated)
Onion - 1/4 cup (finely chopped)
Ginger - Garlic paste - 1 tsp (optional)
Green Chilli - 1 or 2 (finely chopped)
Bread Crumbs - 1/2 - 1 cup (for rolling)
Flour - 1-2 tbsp
Salt - as per taste
Oil - 1-2 tbsp
Preparation
Grate the zucchini and slightly squeeze to get the water out. Keep the zucchini water aside. Add onion, green chili, ginger-garlic paste and salt and mix well. Roll the mixture into small balls. Add flour to the zucchini water and mix well. Flatten the balls, dip in zucchini flour mixture and roll over bread crumbs. Heat non stick pan. Drizzle a table spoon of oil. Place the patties on pan. When the bottom is browned, flip it to the other side and cook. Serve with ketchup.
Zucchini cutlet is ready and yummy!!!
Sunday, May 2, 2010
No Bake Eggless Honey Sponge Cake
There are always those lovely memories that you keep thinking about. One of my memories is of having the Honey Sponge Cake in Leo Fortune Bakery in Adyar, Chennai. Just thinking of the cake makes me drool!!! Call me a foodie :-) Nowhere else have I seen that cake so soft and moist. I wanted to check if that recipe was available in the internet but nowhere could I find it. I hit upon a link for Honey Sponge Cake recipe. But let me tell you, this is nowhere similar to the Leo Fortune cake. Anyways I decided to try it and this is one recipe which is going to stay since it does not involve baking :-). Here is my adaptation of Honey Sponge Cake:
Ingredients
All purpose flour - 1 cup
Baking Powder - 1 tsp
Baking Soda - 2 tsp
Butter - 3 tbsp
Sugar - 3/4 cup
Honey - 3 tbsp
Vinegar - 2 tbsp
Vanilla Essence - 1 tbsp
Serves: 4 adults
Preparation
Sift together flour, baking powder and baking soda. Keep aside. In a bowl, add melted butter and sugar and mix well. Add honey and vanilla essence. Beat well. Add vinegar and mix well. Add the flour mixture, little by little. Mix well after each addition. The batter is ready once the dry and wet ingredients are combined together. Pour this to a well greased dish and cover it with an aluminium foil (see notes). Place the dish on a steamer and steam on low flame for 35-45 minutes. Allow it to cool for 10 minutes.You can drizzle it with honey if required.
Eggless Honey Sponge Cake is ready and yummy...that too without baking!!!
Notes:
- I would have reduced the quantity of sugar since it was too sweet for me.
- I did not drizzle it with honey at the end. Still I was able to get the lovely glaze on top of the cake.
- The cake hardened a bit on the next day. It is best served when warm.
- I forgot to use the aluminium foil as mentioned in the original recipe. I dont know what difference that makes though, since the cake anyways came out good.
This being a no-bake cake, I am sending this to Apy Cooking's No Bake Event.
~ Ramya
Saturday, May 1, 2010
Low Fat Corn and Zucchini Soup
Mornings are business as usual with interactions with my team located in India and the time usually flies. Cornflakes and oats are great breakfast items especially when you are working. During weekends, N gets up late so there is only direct lunch, which gives me some free time in the mornings. But the rest of day is packed with all my cooking experiments (that is how N likes to call it). With my current dieting plan, I have been searching for simple and easy recipes. I have been searching for low calorie and low fat recipes in foodnetwork.com when I came across this Creamy Corn and Vegetable Soup. I adapted the recipe to make Corn and Zucchini soup. Here we go with my adaptation:
Ingredients
Corn Kernels - 1 cup (I used the frozen, thawed)
Skim Milk - 1 cup (I used 1%)
Onion - 1/4 cup (chopped finely)
Zucchini - 1 (medium sized, grated)
Water - 2 cups
Salt - as per taste
Ground black pepper - as per taste
Oil - 1 tsp
Preparation
Blend corn kernels and skim milk until smooth and keep aside. Heat oil over medium heat. Add onion and saute till onions are tender. Add zucchini and stir till zucchini is tender, about 3 minutes. Add water and bring to a boil. Add salt. Allow it to simmer for 5-7 minutes. Add pureed corn until warmed. Do not allow it come to a boil. Season with pepper.
Corn & Zucchini soup is ready and yummy!!!
Since this gets done in less than 20 minutes, I am sending this to Twenty-20 Cooking Event
Saturday, April 24, 2010
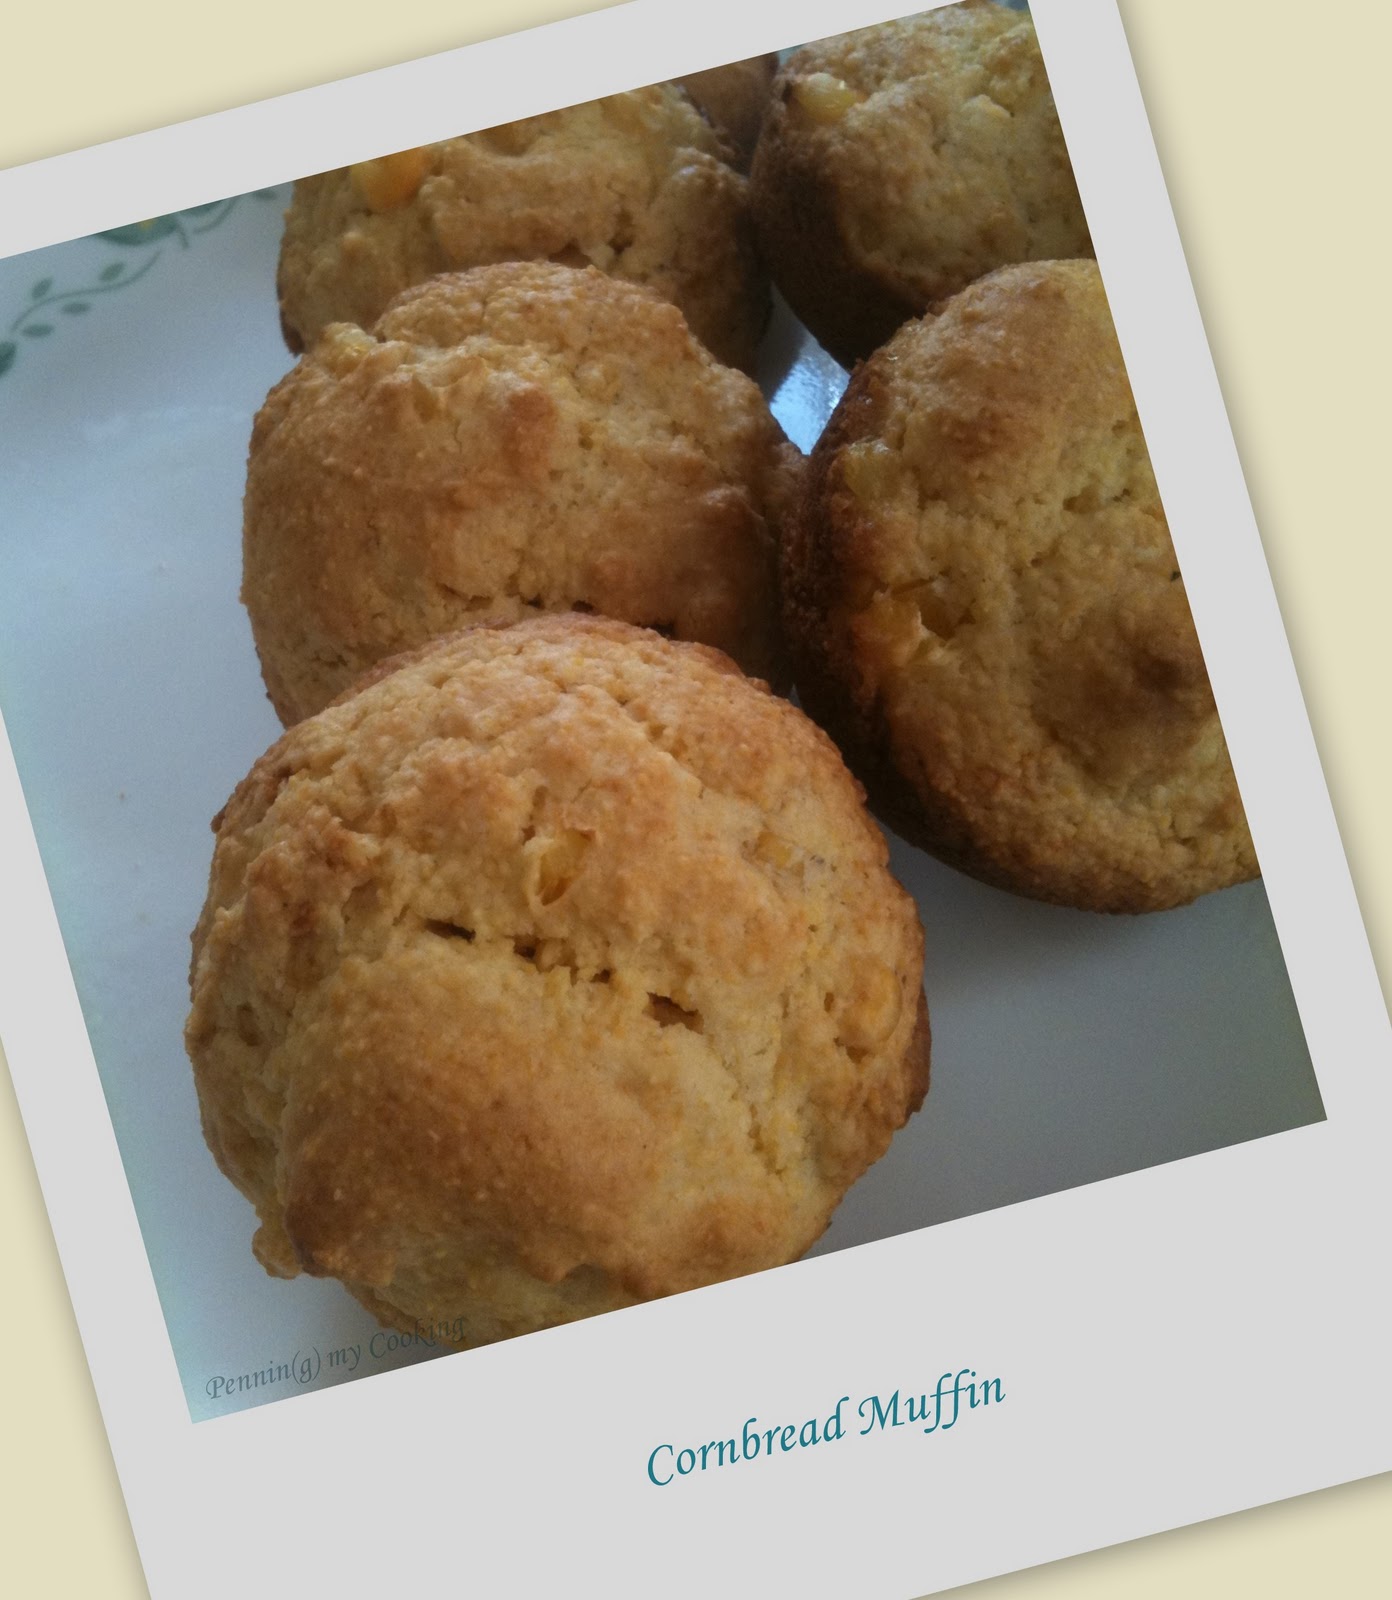
Eggless Cornbread Muffin
I thought muffins were usually sweet. But when I chanced upon a savory cornbread and muffin mix, I immediately picked it up. I don't know why but I always thought of Corn Bread to be similar to Indian Dhokla but with a crust. I did this for breakfast but eventually had it for lunch along with spicy peas masala. I used Betty Crocker Cornbread and Muffin Mix.
Ingredients
Betty Crocker Cornbread and Muffin Mix 6.5 oz packet - 1
Milk - 1/4 cup
Butter (can use margarine instead of butter) - 2 tbsp
Vinegar - 1 tbsp
Baking Soda - 1 tsp
Corn Kernels - 1/2 cup
Cheese - 1/4 cup (optional)
Chopped Parsley - 2 tbsp
Preparation
Heat oven to 400F. Stir muffin mix, melted butter, vinegar, baking soda, corn kernels and parsley. Spoon butter into greased muffin cups. (If you are using cheese, top the batter with cheese after placing in the muffin cups). Bake 15-18 minutes or until it passes the toothpick test. Mine got done in 17 minutes with a nice gold crust.
Eggless Cornbread Muffins are ready and yummy!!!
~ Ramya
Sunday, April 18, 2010
Pineapple Puliserri
No water, no gas, flight delay, no seats summarizes my last two week experience. Though it left me frantically calling customer care, I found it very amusing. When I called my friends / relatives to check if they had any solution, all of them found it even more amusing since they had never experienced gas and water problems in the 10 odd years that they had been living here. The main plus point was I was able to contact emergency customer care and reach out to them easily even in the midnight which would not have been possible in India. But then nothing is comparable to India. India is the best.
Coming back to the recipe, I had about half a pineapple left. None of us could have it since it left an itchy feeling in the mouth. I did not have the heart to throw it out. I was thinking of making pineapple based desserts and had been searching foodbuzz.com and foodnetwork.com. I have never heard of pineapple pulisseri and when I saw this recipe in foodbuzz, I wanted to immediately try it. I picked the recipe from here. This dish was similar to Aviyal minus the vegetables.
I wanted the dish to be solid without much of gravy. Here is my version:
Ingredients
Pineapple - 1/2 of medium sized pineapple cut into chunks
Turmeric Powder - 1/2 tsp
Salt - as per taste
For grinding to a paste
Coconut - 3 tbsp (I used frozen)
Cumin seeds - 3/4 tsp
Red dry chillies - 2 (increase as per taste)
Yogurt - 1 cup
Coconut Oil - 1 tbsp
Mustard seeds - 1/2 tsp
Curry Leaves - 3 (I did not have them so did not use them)
Asafoetida - a pinch
Preparation
Cook the pineapple with salt and turmeric powder in about 1/2 cup of water on medium heat till the pineapple pieces turn really soft. Lower the heat and add the finely ground paste. (Since I used a blender, I could not grind the ingredients to a fine paste). Mix well and turn off the heat immediately. Heat oil and add the seasoning. Add to puliserri.
Pineapple puliserri is ready and yummy!!!
I found this to be a meal by itself after having a cup of only puliserri.
~ Ramya
Subscribe to:
Posts (Atom)